Nokia's support for DNG on Smartphones

0


After a disappointing announcement for the new iPad line (sorry, no new camera on the new line) Nokia seems to have upped the ante by announcing DNG support for the Lumia 1020 and the 1520 to the surprise of the photographic community.

For the uninitiated, Adobe's DNG format holds a lot of promise for smartphone imaging. Since its inception in 2004, the format has gone through several upgrades, allowing the format to store cropped image metadata as well as multi frame HDR data. Nokia's adoption of this particular format bodes well for the Lumia 1520 but not the 1020.

Part of the problem with a 40 megapixel DNG file is that you need to have the storage to put all that data. The Lumia 1020 has a paltry 32GB of internal storage while the Lumia 1520 has microSD access of up to 128GB capacity.

DNG files are an offshoot of TIFF, meaning that they get mighty big in RAW form. As a guide, a 40 megapixel camera yields a 40 MB file. That's a heck of a lot of data to store on a device without expandable memory.


It is good to see that Nokia is taking a different route to win over smartphone photographers but they are fighting an uphill battle on this one. Compact cameras with lesser megapixels handle imaging better and the only salient point for the Nokia buyers is that you have the camera built into a phone.

Given the price of the Nokia 1520, it doesn't make sense for casual photographers to ante up since you get much better images with digital compacts. Pro photogs might be tempted as it can effectively work as a back up camera in most circumstances. It remains to be seen if this route will work as Pro photogs are finding it increasingly hard to get smartphone photos accepted in commercial work. Showing up at an assigned event with just your Lumia as the main camera could mean only two things. Your client will either love you or hate you for it.


Live your Dream as a Photojournalist with DEMOTIX

0


I have the upmost respect for photojournalist, especially those who risk their lives to report in the nether regions of social justice. Think Don McCullin, Kevin Carter and Eddy Adams. I had the pleasure of meeting Eddy Adams once in the 1990s and was in awe of what he had done. To risk his life to report the news was indeed noble.

Since then, the transition to digital photography and digital imaging has taken a huge chunk from this once reputable profession. The pay is no longer rewarding, and your employers would rather not send you into a hot zone just because they are reluctant to pay your expenses or take out a Lloyds of London Insurance Premium. The decline of print based journalism made it totally unfashionable to get qualified photojournalist into the hot zone and thus was born Demotix. This is where newspapers like Le Monde, BBC, WallStreet Journal and New York Times start looking for a cheaper alternative and it's not Reuters, AP, UPI or AFP.

Demotix hopes to change how photojournalism works by offering you the chance to work like a pro and be paid like an amateur should you suddenly find yourself with too much free time on your hands. Profits are split 50:50 but there is no mention on what is the going rate is for pictures and videos.The term "profits" is contentious. Profits are not calculated at "gross" as there is a withholding TAX which is applied to your earnings. Even though you are working and reporting from a place outside of the UK, Demotix will minus your earnings for UK Tax.

Press Credentials for Amateurs

In the old days, this was the passport to getting great news but these days, a Press Pass is more useful for getting into a rock concert without paying. You can only apply for press credentials from Demotix after you have logged in 20 stories. If you don't have 20 stories to your name, you'd have to fork out US$20 for one.


This makes good sense as the press credentials will offer you a chance to roll with the crowd at public events, expos and product launches. It might even get you pass a police cordoned line if you are lucky. This card will enable you to get a validated national news accreditation, which is far more valuable for collecting news items from you own country.

Equipment Questions

Fortunately for most of us armed only with an iPhone, this is only requirement you'd need to apply to send news to this agency. Demotix takes both still photos and video feeds so whatever you have, you can load it up and send it in. DSLR are the preferred choice but your trusty iPhone will do should Godzilla ever came ashore in a hurry.

Items shot with a DSLR will have to be uploaded using a web browser so there is no real preference to equipment by Demotix. You do not have to use their custom iPhone app just to upload news items.

For the mobile photojournalist, Demotix only offers an iPhone app (which should work on an iPad I reckon) for those quick uploads but no word yet on an Android or Windows Mobile (or Blackberry) app.

From Demotix's business model, I had to refer to the Wiki which said that your news stories would be sold from between US$50 to US$3,000 per story. Demotix can also sell exclusive stories at a much higher rate though I do not expect this to be the norm. Exclusive stories cost you money and time, and if you are not well heeled enough to crack the next Watergate or Irangate feature, I doubt you can score an exclusive.

Even though Demotix may not offer you the best news credentials to carry out into the field, it does offer you a way to get started in the heady world of photojournalism armed with only the bare essentials.

Making Money Opportunities

There are many of us who dream of breaking into the news industry. Unfortunately every blogger on the planet seems to have the same idea and for you to score points above them, you can't be desk bound. If you like going about and looking for things to report on, there is plenty to do.

To be fair, Demotix offers you the opportunity to break into the this world and it should not be taken lightly. Being in the position to offer news to the world is something unique and can even be life changing. Think of it as a stepping stone to your next career option.


Magnum takes swipe at Creative Commons

0


A new service from Magnum Photos is about to be rolled out and it's going to take a swipe at Creative Commons. For a flat annual fee, you can download and use ANY Magnum image without watermarks on your non-commercial website.

For the longest time, photography had been a barometer of human activity. Photographers have captured those precious moments on film and saved that for posterity but lately, photos are not worth more than a postage stamp — thanks largely to Photoshop and digital imagery.

Magnum, being the oldest photo agency on the planet can't have you taking their pictures with a creative common twist. Even though you only want to use it on your website for non commercial purposes (which is contentious at best since you earn traffic revenue from web advertising) Magnum has the right to send you a DMCA takedown for using their photos without their permission.

What is the Value of Digital Images?

For old school stock agencies, the last thing they want is to host photos from non-agency photographers. The deal behind Magnum Photos as a collective agency is that the whole library of images is set up to benefit Magnum members and since they can't be possibly  shoot the usual commercial crap one has known to expect from a royalty free stock agency, those images from the past should be worth far more than the postage stamp.

I have nothing but sympathy for Magnum Photos. I  have worked with them in the past and they do try very hard to innovate but going out to enlist bloggers by asking them to pay an annual fee to use photos without watermarks is probably asking too much. Bloggers are a different breed. Think Perez Hilton, who as a successful professional blogger wouldn't even pay a cent even when he's being sued for using images without permission. His best excuse? Let's toss in a photo credit and be done with that.

As a collective agency, I was once in talks with Magnum to get sponsorship from Sony to host an exhibition but that faltered for several reasons, first being that the bulk of their photos were shot on film rather on digital. And even if they were shot on digital, it wasn't shot on a Sony camera. Companies like Nikon or Canon could sponsor them but they too do not see the same value since they are the big shots of the camera scene. Leica could of course do this but heck, they are a premium brand. If you shot Fendi, Burberry or LV, maybe they might consider it. Photojournalism isn't a hot commodity these days as anyone with an iPhone can upload the latest video and pictures onto the Internet for free. Magnum built their reputation on photojournalism, which at this time is being savaged by the digital age. No one pays attention to where the photos came from—and much less of the photographer who took it.

Magnum is a prestigious agency and to shore up their revenue, they are hoping to convert up to 30 percent of their recalcitrant image thieves to their new membership model though I think they would have more success if they were aiming for between 1 to 10 percent. Frankly bloggers are not out to pay for images and even if they did, they would want to desecrate them into personal Memes which they can share online. Robert Capa and HCB could be turning in their graves as we speak....


The Money Making Myths of a Google Business Photographer

1


Since the launch of Ricoh's Theta camera, it brought back memories of my time with an IPIX camera in the 1990s. It functions the same way since it captures spherical images which needs to be stitched together with a desktop software. For Ricoh's Theta, you only need an iPhone app if you don't have a computer at your disposal.

Judging from the quality of the images, the first thing that came to mind is that Google could open this up to people with such a camera to capture extended Street View photos.

Google Business Photographer


This sounds really spiffy. Google Business Photographer. Wow. You must earn as much money as the stock has in recent years. That would be cool if you could make a load of cash by joining them.

Right now, the program is only available in the US, Australia, NZ and UK, and in time will be extended to other parts of the world. To sign up to be a trusted photographer, Google has some requirements which you must meet.

Equipment List
Google has strict criteria for this, and you need to have a camera with a 8mm fish eye with a 180 degree field of view. You can use most commercially available DSLRs with either APS-C or Full Frame sensor. So forget that puny smartphone camera you been raving about. It won't do.

Exposure Stacking Technique
To capture successful photos, you need to overlap each picture to make a seamless bubble, meaning you have to capture four scene from a single shooting vantage. Each of these must be bracketed, so you have a total of 12 frames with varying exposure. With three frames, you stack the exposure to create the best dynamic range for each scene therefore negating the HDR effect. You get a blended image. Exposure stacking allows you to shoot at a low ISO so that noise would not be a problem. Lower ISO also gives much better dynamic range which is what Google is looking for. To know more about exposure stacking, click this link. Since this will be shot with a tripod, there is no need to worry about shutter speed or aperture. You can preset your aperture to a f/11 value to get the best image for any indoor location.

Must have a Viable Photography Business

Yep, you have to be pro in some ways, with a dedicated photography set up, website and license to operate a business. This is to avoid any eventual flare ups between the business owner. There is even a clause that says this:-

Photographer will refund all Service Fees to the Business (but will have no further liability with respect to the agreement) if Google rejects the photographs for failure to meet the Google Business Photos technical specifications and Photographer does not correct the failure after re-photographing the Business at a mutually-agreed upon time.

How Street View is Extended Indoors

The whole idea is that upon walking on the road, or driving, you might want to take a peek at what's in store. It could be that you're running some chop shop or whore house that looks perfectly decent from the outside but it rocks on the inside! I'm just kidding. But if whoring is legal in your country, I am sure Google will allow indoor photos of your establishment on Google maps.

To get an idea of what sort of photos can be achieved through the humble use of a camera on a tripod, just click the link here.

Published Rates for Photographic Services

You get a rough ballpark cost for doing something like this and I have put two such services here. It's not much really. In fact, Google doesn't pay you a cent for taking the photos, the businesses that want their pictures taken do.

You can of course charge a fee for this that is beyond the structured fees charged by these individuals as it does not include transport, lodging or any other operation cost. Personally, I have problems with such a cost structure as it is not something you can a 'stable' business. I have often argued that photographers are paid far less today than they were during the analogue era for one simple thing. Film was a consumable cost and can be charged back to the client, whereas computer time, spent in post production of images cannot. In its day, you paid a photographer to take a fixed number of pictures which came out of a color lab. Today, you need to BUY computers to enhance your images before delivering them to your client, which you can't charge for. Software cost money and so does the computer. If you are not handy with a computer or software for imaging, you had to hire help and that added up to your final cost of delivery. This is something people take for granted in the digital world.


UK Rates For Google Street View Photography
Micro Business £195.00
Up to 5 Virtual Tour viewpointsUp to 10 Static PhotographsSetup of Google+ Local pageHosting on Google+ LocalEnhanced Google Search resultsIntegration into Google Street ViewIntegration into Google MapsQR codes linking to your tour


Small Business £245.00
Up to 10 Virtual Tour viewpointsUp to 10 Static PhotographsSetup of Google+ Local pageHosting on Google+ LocalEnhanced Google Search resultsIntegration into Google Street ViewIntegration into Google MapsQR codes linking to your tour 

Medium Business £345.00
Up to 20 Virtual Tour viewpointsUp to 15 Static PhotographsSetup of Google+ Local pageHosting on Google+ LocalEnhanced Google Search resultsIntegration into Google Street ViewIntegration into Google MapsQR codes linking to your tour 

Large Business £445.00
Up to 30 Virtual Tour viewpointsUp to 15 Static PhotographsSetup of Google+ Local pageHosting on Google+ LocalEnhanced Google Search resultsIntegration into Google Street ViewIntegration into Google MapsQR codes linking to your tour
US Rates for Google Street View Photography

Package One- $299Consists of approximately 1 hour of 360 Panorama Photography with up to 10 scenes of your business interior. Also included an additional 1/2 hour with up to 6 still photographs required by Google of your business, signage, and details of your location. Average business floor plan of 1500 sf or less. All images are uploaded to Google Pages for you.

Package Two- $399Consists of approximately 1.25 hours of 360 Panorama Photography with up to 15 scenes of your business interior. Also included an additional 1/2 hour with up to 6 still photographs required by Google of your business, signage, and details of your location, with and additional 1/2 hour shooting 10 still photographs specified by you. Average business floor plan of  2000 sf or less. All images are uploaded to Google Places for you.

Package Three-$499Consists of approximately 1.5 hours of 360 Panorama Photography with up to 30 scenes of your business interior. Also included an additional 1/2 hour with up to 6 still photographs required by Google of your business, signage, and details of your location, with and additional 1/2 hour shooting 10 still photographs specified by you. Average business floor plan of 2500 sf or less. Also, an additional 1/2 hour commercial portrait session with your team. All images are uploaded to Google Places for you.

Package Four – $999This is for a small Furniture store / Department Store / Large Retailer – Consists of approximately 2-4 hours of 360 Panorama Photography with up to 40 scenes of your business interior. Also included an additional 1/2 hour with up to 6 still photographs required by Google of your business, signage, and details of your location, with and additional 1/2 hour shooting 10 still photographs specified by you. Average business floor plan of 5000 to 7000 sf. Also, an additional 1/2 hour commercial portrait session with your team. All images are uploaded to Google Places for you.

Making Money Myth Dispelled

Yes, it's not a full time affair judging from the fees pros are charging for something like this. You can't possibly be charging these rates and relying on this to bring home the bacon so to speak. A typical package with a basic location shoot with travel time, planning and digital post production will cost you 4 hours tops. For US$299, that works out to less than a US$100 bucks an hour. In a day, you can only possibly do two clients, which means US$600 a day tops. Doesn't make sense if you are a Pro. Wedding photographers earn more than that in a single sitting. Judging from the fees charged now, you can safely assume that it is not a niche photography market.

If you are an amateur on the other hand, with a Ricoh Theta camera and a Tripod. It makes good sense to earn some pocket money by shooting an entire location with for a mere fee of US$299. That's coz the Ricoh Theta cost only US$399! You could get a return on investment real quick and make money on your second shoot. Sounds lovely but until Google makes that official, you won't be qualifying yourself as a Google Business Photographer.

Update: Google has introduced a new Street App, which allows you to upload bubble photos using an Android device and there is support for bubble photos shot on the new Ricoh Theta as well, however there is no word on this from Google to say that you can junk your DSLR in favor of the Ricoh point and shoot to qualify as a Google Business Photographer.


BEST KEPT SECRETS OF STREET PHOTOGRAPHY

1

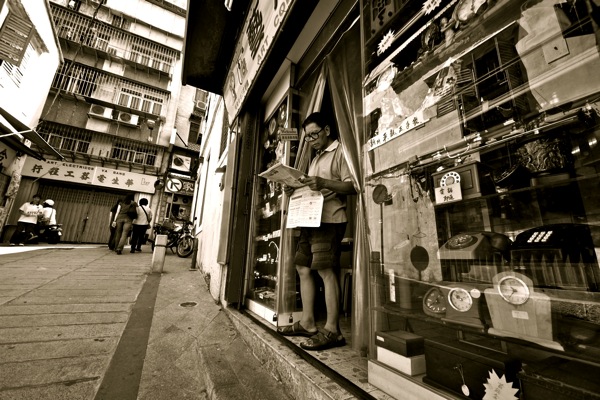
As a writer cum photographer, I have done my rounds as a photojournalist whenever the call came up and for that, I have never found it as a means to make money from it. It was part of the job. People often ask me about shooting street and I tell them that you need to have a few qualities before you embark on your quest. First, let's be clear photojournalism is about observing life through the lens and in many ways, it is the same as Street Photography. You don't make tones of money from Street Photography, and unfortunately in the West, you can even get arrested for just having a camera pointed at some place within the city. Cameraphobia as I call it, need only apply to big city places like London or New York. If you have a natural affinity for observing people, you'd pick out interesting scenes to frame your pictures but the best kept secrets are often ones that you tend to ignore. 


Don't Attract Attention

A rule that is often ignored as you lug that huge DSLR with a massive Zoom lens.  People like to pretend to be some big shot photographer and become the target of thieves and police. This is not the way to do Street Photography. As much as possible, people should not know you're capturing pictures. Use a smaller camera when possible and learn to blend in instead of stand out. Smaller cameras too have smaller zoom lenses with equal magnifying power, so there is no excuse for carrying that bulky DSLR. 


Use Fixed Lenses

For a change, be limited by your equipment and see how you can best adapt to that situation with a fixed lens camera. In the old days, a 50mm lens was called a standard lens and the preferred choice of all street photographers. HCB of Magnum was famous for this. So if he could do it, why can't you? 

Shoot from the Hip

A lesser known method is to shoot from the Hip and with a fixed lens, it is so much easier. Shoot from the hip is precisely that, you trigger the shutter when you "feel" a picture is happening before you without peering down on your viewfinder. 

Some of the best pictures may not happen at eye level and you have to feel your way around it. If you were born a Hobbit, then it's eye level. 

Once you get accustomed to the field of view of a fixed lens, it becomes very easy for you estimate the length and depth of your subject. It is not a precise way of composition but the results are sometimes quite surprising. 


The Good, the Bad & Ugly of More Megapixels

0
Coloredorginal

I have often been asked about the Megapixel debate, is it some urban legend? Folklore? Or some old wives tale perpetuated by camera manufacturers? But what I am going to say is going to be based on facts, and having worked with Sony's DSLR division, I sort of know the good and bad of the megapixel race. All too often, we find ourselves confronted with decisions on which camera is better based on just the megapixel count of a sensor. Now more megapixel means more detail in a picture but only if it is exposed well. Put that context into a low light scene, the sensor's sensitivity comes into play and this negates any gain in detail. But let's not work on that. Let's assess what more megapixels will do for you.

The Good side of More Megapixels

Henri Cartier Bresson of Magnum, known fondly as HCB, didn't like his photos cropped but with more megapixels, cropping is actually good. Let's use a photo I took as an example. The original is above. Let's do a HCB time lapse into the world of B/W photography and turn this into a contrasty picture of a street scene.

Uncroppedmegapixel
The composition isn't spot on. There is lot of room and in the editorial room, it would be considered a "loose" photo since it is not tightly composed.


Croppedmegapixel
Here is the cropped photo, by throwing away rougly 1/3 of the size of the photo, it becomes a better picture. So if you happen to be shooting with a 24 megapixel DSLR, this image would be roughly 24MB in RAW size and after cropping, a third of frame, you are still left with 18MB of image data. Now that is a big image!

The BAD of having More Megapixels

High density sensors cost more to manufacturer and low light handling isn't as good.
Often, dynamic range will suffer as these smaller high density sensors just doesn't have the muscles compete unless helped along with brute force noise reduction steroids. Larger sensors handle light better but large high density sensor cameras also cost a bomb to own.

The UGLY side of More Megapixels

If you look at the above cropped pictures, and realize that you can take a "loose" picture and still rescue it later with cropping, don't you think that you'd be a loose photographer than a tight one? Pros everywhere have one strong point, they don't need any image cropping for it to come out right. Should you rely on more megapixels to save your day, then you will forever be dependent on it. By relying on post production miracles, you'd stop being a photographer and more of an image manipulator. This is the ugly side of photography which we all try to avoid but get sucked into. Cropping your image in-camera is the best way to go if you want to improve your sense of composition.


Conclusions

There is no right or wrong way to see this Megapixel Myth. The more insecure you are about your pictures, then the obvious route to take is to have more megapixels. The more confident you are about your photography, then the megapixel myth would have fallen away from you mind and in essence make you an even better photographer. So learn to work with what you have.

Understanding Exposure in the Digital Age

0
Confusing as it is, you have to understand this and I did the hard way with rolls upon rolls of film but today, people don't seem to care as they leave their cameras running on Auto. The fundamentals of exposure are not understood in the correct context and as such, mishaps will happen the moment you go full manual.

Holy Trinity of Exposure


When I started out, the first thing I had to understand was the correlation between ISO, Shutter Speed and f/stop. I had trouble imaging this because the damn SLR I got was fully auto EOS Canon. And the compact cameras I had didn't help either as there was no way to see this in action. It was that I bought into an old used, Nikon FM2 that I finally understood how they were related.

Everything in camera exposure is related to one another. The moment you preset one value, then you will be able to see how that value affects the others. Should any one of those change, for example, the shutter speed, then the corresponding Aperture and ISO would have to change as well to reflect this. One of the best way to understand this is to fix one of the variables so that you can see these changes.

Exposure Variables through Shutter Priority and Aperture Priority


In fully auto digital camera these days, many would shoot using AUTO mode and rarely will people even venture to P or Program mode. Confusion and madness abound when either Shutter Speed or Aperture is not fixed. This way, you can see how and why it affects exposure. Every scene is dependent on the available light at that moment. This is minimum exposure required to render an image. To learn about exposure, refer to the chart above where we have prioritized either the Shutter Speed or the Aperture's f/stop number. 

In the first example, by keeping the shutter speed at a constant 1/60, you will see how this affects both the ISO and Aperture. Shift the ISO up to 200, and the corresponding Aperture will have to go up to f/8 just to maintain the 1/60 shutter speed. 

The second example is the same, you have the Aperture fixed at f/5.6 but when you start to shift your ISO up to 200, the shutter speed will have to change to 1/125 and so on. 

Why ISO matters

This is a personal preference as some may shoot using high ISO like 1600 to 3200. The rule to remember here is that ISO will affect the quality of the image—giving it a noisy and grainy look as you go up the ISO ladder. So staying low is probably the best way to get good imaging. 

Exposure stacking, which is similar to HDR photography except that you capture only three frames with a 1EV difference between them is probably one of the most effective ways to capture night time photos without high ISO. Trusted that this method works best for scenes without moving objects, I have seen this method applied to model and fashion photography in high contrast scenes. The reason for such a method is to arrest the problems of the sensor's limited dynamic range by clawing that back with a three frame shot. 

High ISO is more effective in situations where there is movement and low light where exposure stacking is not possible due to movement of the subjects in the foreground or background. 


Depth of Field for Bokeh

Aperture control is a deft art. You can't deny its artistic merits but you can use a cheat sheet for this. How it affects exposure and DOF (depth of field) is sublime. 


As much as I love playing with the aperture, you have also got to understand that your choice of f/stop is dependent on exposure. If you want to throw something out of focus, then you need to keep the aperture wide open to let in all the light while throwing the background out of focus. Even during the analogue era, we had to get to grips with DOF for without it, the pictures would look dire. Digital is no different but there are more restrictions, something I will reserve for another article. 


Master of All Exposures

Once you jump over the exposure hurdle by learning how to Aperture, Shutter Speed and ISO affect one another and in turn give you the creative edge in creating a picture, then you have ascended to a new level of photography. 

These basic rules must be understood. Once you have this, you can apply various techniques found in digital cameras to further your imaging goals. 

I didn't have to worry about the transition as I had already grasp the very basics of exposure and applied that to digital. For this, I hope that you will start with manual settings on your digital camera and learn to shoot with it to see the difference. I spent a fortune on film learning the outcome of my exposure experiments but you don't have to once you have a digital camera in tow. For this alone, there is no reason why you can't master this with just a few clicks.